Wednesday, December 16, 2009

Baked Macaroni and Cheese

Everyone should know how to make a good Macaroni and Cheese. And I'm not talking about the Kraft box kind. As my numerous followers know, I like food with a little kick to it. This Mac and Cheese recipe has just that. Plus, broccoli adds vitamins or nutrients... or whatever you call that healthy stuff I'm not getting out of my nutella jar. This recipe, like 80% of my blog, is based on a recipe of my Mom's. I just started adding cherry tomatoes which I think adds great color and flavor. I figured tomato slices are delicious in grilled cheese sandwiches... so they would taste just as good in Macaroni and Cheese.

The prep time for this dish is a little longer than my usual items but because of that this recipe leaves leftovers. What you do tonight you don't need to do tomorrow.


Before getting out anything, start boiling water because you need cooked macaroni elbows for the recipe.

1. cook about 10oz of elbow macaroni.
2. While cooking the pasta add the following ingredients into a large mixing bowl:
16 oz container of onion dip (I usually end up only adding roughly 10oz, I don't like it overly sour)
12 oz of cottage cheese
2 whisked eggs
8-16 oz of once frozen now thawed broccoli spears. I break it into smaller sections.
2 cups of FRESHLY grated cheddar cheese. I did this once with the easy stuff already shredded in a bag--big mistake. The fresh stuff makes a big difference.
1-2 tsp of crushed red pepper, depending on how hot you like it
more than a handful of rinsed cherry tomatoes.


Once the macaroni is cooked, start preheating the oven to 350 for baking and drain the pasta and add it to the above mixture. Mix everything all together and place into a glass baking dish. I actually use two dishes when I do this. We eat one the night we make it and the second dish is for leftovers.


Melt a tablespoon or so of butter and sprinkle this on top with some bread crumbs.

Bake at 350 for about 40 minutes. If you fill one dish to the top you may want to cook it longer, but if you have two dishes with a thinner amount less time would be fine. You want the dish to still be soft.

Enjoy!

Thursday, December 10, 2009

Hi Readers! This is Nicole, Summer's little big sister back in Southeastern Mass. Summer is going to let me guest blog today and share a meal I made with our slow cooker. Hope you enjoy.

**********************

Today I made a very yummy, soul pleasing, slow cooked white bean and chicken chili. The slow cooker is one of the greatest kitchen gadgets I own, second only to my expresso machine. (Yes, I own an espresso machine.)

This recipe is quick and easy. It only takes about fifteen minutes to prepare and it simmers away in the slow cooker all day while you’re at work or school. When you walk in the door exhausted and hungry, the house smells delicious, and dinner is ready and waiting for you.

To make this chili, you’ll need:


2 cans of white cannellini beans
1 can of corn
1 can of green chilis
32 oz (4 cups) chicken stock (The carton is usually 32 oz so use the whole thing)
boneless chicken breasts (I used three.)
half a yellow onion
a couple of garlic cloves

For spices, you’ll need:


1/8 tsp Ground Coriander Seed
A pinch of salt
1 tsp Cumin
1/2 tsp White Pepper
1 tsp Oregano

You’ll also need olive oil to saute the onion and garlic, and cook the chicken. After the chili cooks all day, I added 1/4 cup of heavy cream and some flour to thicken it up.

So, to get started, you need to put about a tablespoon of olive oil in a skillet and warm it up on medium heat. While the oil heats, chop up the onion into very small pieces with a butchers knife. Very. Small. Pieces. When you think you’re done chopping, chop some more.


The oil should be nice and hot by now, so put the garlic in a garlic crusher and crush it into the pan. If you’re Italian like Summer and I, use four or five cloves. If you have an Irish stomach like Summer’s man, stick to two or three. Push the garlic around with a spatula and let it sizzle away for about a minute. Don’t let it turn brown. Add in the chopped onion, and also the coriander, cumin, and oregano.


Continue turning the mixture with the spatula until the onions start to look translucent. This smells amazing...
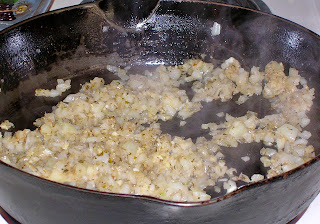


Amazing.

Once the onion mixture is done, scape it into the slow cooker. If you’re using a cast iron skillet like I am, get someone with upper body strength to help you. Put the skillet back on the burner, add a little more olive oil, and place your chicken breasts into the skillet. Still on medium heat, cook them just until the outside of the chicken is nice and white, then place the chicken into the slow cooker right on top of your onion mixture. The chicken will finish cooking through when you turn it on.


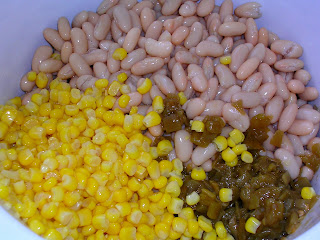
Drain and rinse the cannellini beans and toss em’ on top of the chicken and onions. Add the corn and the green chilis.


Pour the chicken stock in. I also wound up adding 1/2 cup of white wine. Try not to sample the wine and stick to your morning cup of coffee.


Now you’re ready to turn the cooker on and go about your day!


I let this simmer on low for about 8 hours. When I got back from school, (after I savored the aroma and finally poured myself a glass of that white wine) I removed the chicken breasts from the cooker and shredded them with a fork. I put the shredded chicken back into the cooker, added 1/4 cup of heavy cream and a sprinkle of Wondra flour to thicken it up, (just add little bits of flour at a time until you're satisfied with the thickness) and tossed in a pinch of salt and about 1/2 tsp of white pepper. I left the lid off of the cooker and set the heat up to high for about 45 minutes and let it simmer away.

I forgot to take a picture until after we ate about half of it, but here it is:


Not the prettiest dish you’ll ever see, but with chili it’s all about the flavor. This was spicy and warm and a nice variation on the usual red bean/red meat chili. Try it with some fresh cornbread and I think you’ll agree.

Sunday, December 6, 2009

Nutella and Walnut Pastry Square


This is ridiculously easy. I saw my Mom do it when I was home for Thanksgiving Break so I threw it together Friday night. It's really good. You can trust me on that because, like October's pizza, I forgot to take a picture until after I started eating it.

Ingredients:
1 Pastry Puff sheet (most packages come with 2)
a little flour
1 egg
1 jar of nutella
walnuts

Thaw the puff pastry and roll it out with a pin so there aren't any cracks. You'll probably need some flour to keep it from sticking. Using a knife, lightly cut about 1 inch from the edge. Do this all the way around. This makes the crust. You don't have to cut all the way through, just enough so you can see it. Preheat the oven and beat an egg. With a pastry brush paint the egg-wash along the crust: this makes that nice golden color. Let it puff up in the oven (maybe 15 mins). Remove it and while it's still hot spread nutella on the top. You might want to place a few globs of nutella on it and let the chocolate heat up before spreading it. This will make it easier to spread. Otherwise you might pull up the flakey top. Then sprinkle some crushed walnuts on top and put back in the oven for a few minutes before eating it.

After digging in it's just as good refrigerated.

Saturday, December 5, 2009

New Calzone Pics

To better visualize October's Calzone recipe you better check out these pics!


This is the spinach and feta calzone. There are lots of ingredients to add to the spinach so check it out in the earlier recipe.


This is the provolone, ham and soppressata (hot) calzone. You could also replace the soppressata with salami. I crumble feta in this one too just because it has a great white color when it's done cooking. The provolone tends to blend in color with the dough.


yummm

Wednesday, December 2, 2009

Chicken Parm


There's nothing like coming home after a long day dealing with hormonal 11 years and cooking some good food. It's like they all disappear while Amy Winehouse sings in the background. Ms. Cannon morphs back into Summer. ahh.

Two nights ago I made some chicken parm and it came out goooood. Honestly, I'm not a huge chicken parm fan usually. I've never ordered it in a restaurant. Dan likes it a lot though so I wanted to make it for him. It came out really well though, so here goes.

Ingredients:
Chicken breasts
bread crumbs
milk, about 1/2 cup, maybe a little more
1 egg
olive oil
Parmesan cheese
provolone cheese
some shredded parmigiano-reggiano (or regular parm)
red sauce

-Rinse the chicken breasts and put on a plate. If they are thick I would pound them flatter so they cook faster, but it's up to you.
-In one bowl stir up the egg with fork and add some milk. mix.
-In a second bowl pour some bread crumbs and mix with Parmesan cheese.
-Dip each piece of chicken into the egg and milk mixture and then into the bread crumbs. Make sure the breast is covered in bread crumbs.
-After doing this for all the chicken pieces, pour some olive oil into a skillet (so it covers the bottom) and turn on medium-high. Once the oil gets hot you are going to fry both sides of the chicken breasts. Leave on each side for about 4 minutes or until a nice brown color and be careful when flipping it because you don't want to splatter hot oil.

While doing this preheat the oven at about 350.

-In a baking dish place the chicken breasts on some tin foil. Pour on some red sauce and sprinkle some Parmesan cheese. Then place some strips of provolone cheese on top. Bake for about 25 minutes.

When we ate it I also served it with some spaghetti and yummy rye bread. Enjoy!

Sunday, November 29, 2009

Shish Kabob


This is fun to make especially during the summertime. We don't have a patio or anything to grill on, but cooking these on the Cuisinart grill was almost as satisfying. Like most of the recipes I put on this blog, you can really personalize it using your own tastes and favorites. My recipe is with beef but you can obviously do this with chicken and even fish.

Ingredients (how simple!)
-1 lb or less of meat rounds (beef). This way they are already cut for you.
-Fresh veggies. We used onions; red, yellow and green bell peppers; and mushrooms.

First, rinse the meat rounds under tap water and place and dry on a paper towel covered dish. Choose a marinade that you like. We used Peter Luger's steak sauce which, if you can order it or buy some, I highly suggest you do. You really should get to their Steak House Restaurant before you die.

Cut up the veggies into pieces closely matching the size of the steak. If the steak pieces are too big chop them down a little bit. This will cut down on cooking time. Remember you will be cooking the edges first and the inside of the meat will be cooking last.

If you are using wooden skewers soak them in water for a few minutes before piercing the meat and veggies. This will prevent it from burning. If you really want your veggies well cooked I would cook them on the stove in some oil before placing them on the skewers. This will guarantee they are nice and soft.

Cook on the grill turning occasionally until the meat is how you like it (we usually do medium).

Enjoy!

Friday, November 27, 2009

Some More Thanksgiving Pictures

Some gravy, mashed potatoes, squash, and turnips and hardworking Head Chef Avis.

Plus a fuzzy Gritty McDuff. No recipe could recreate his perfection though.


String Beans and Whole Cranberry Sauce

I felt these two should go together because they are complimentary colors.


String Beans:
Fresh from the grocery store!
Snap the ends off and rinse before cooking.
Place them in a steamer basket with about an inch of water on the bottom. On top put three cloves of crushed garlic. Then steam until tender (maybe 10 minutes).
After they are all steamed add sliced almonds that were toasted on a dry pan (stovetop). Serve in a bowl with the almonds on top!


Whole Cranberry Sauce
You can obviously buy the Jelled Cranberry Sauce in a can at the store, but this is better if you ask me. Just buy a bag of cranberries at the store and follow the directions on the back of the bag. Basically it's sugar, water and whole cranberries. mmm mmm good. Let it gel overnight in the fridge.

We had both so I have two pictures. If you ask me the whole cranberries are much more visually appealing.

Turkey and Stuffing


My favorite dish every Thanksgiving is the stuffing. When I was a kid my plate would basically have stuffing and mashed potatoes on it. I have branched out since then... but stuffing it still, to me, the cream of the crop.


Stuffing Ingredients:

-chopped Celery and Onions cooked in a stick of melted butter.
-Then add salt, pepper, and some bell's seasoning.
-Add cubed white bread and mix all together.
-add chicken stock to moisten.

The amount will depend on how many you are cooking for. Stuff what you can into the neck and cavity of the turkey and the rest can be cooked in the oven. There is a huge difference between the stuffing from the turkey and the stuffing baked in the oven. The turkey stuffing is so much moister. You can tell even by the pictures.

Ma cooks up the giblets with onion, celery, salt and pepper covered in water to make the stock for the gravy. Grandma Horton then takes over and makes the gravy.


The Turkey

In Rehoboth there is a place called Bellwig Turkey Farm where people line up all down Route 44. I always feel a little bad driving by because you know their death is imminent. A vegetarian friend of mine worked there one season... before becoming horribly traumatized. He is still a vegetarian. Kids from town would sometimes steal the turkeys too, spray-painting them green and gold and bringing to the Thanksgiving Day Game against Seekonk. They'd walk their rescued turkeys on a leash. One year we gave into the frenzy of Bellwig Turkey Farm and got our turkey there. It wasn't great. My mom thinks the Butterball Turkeys at Hannaford's or Shaw's are way better. Anyway, this is how we cook our turkey.

My mom has her Grandmother's roaster passed down through the matriarchs. We cook the turkey down in the basement and the smell wafts up all morning.

Preparing the Turkey:
First my mom stuffs it and then rubs it in vegetable oil.
Tuck the wings under and then put a few teaspoons of water on the bottom of the roasting pan. This makes for a better gravy and easier cleanup.
Cook for 18 minutes per pound (ours was 16.65, you do the math)

Take out the stuffing and serve it in a bowl and then use the drippings for gravy. To the drippings you add salt, pepper, stock (described above), Wondra, and thyme.

Happy Thanksgiving!!

Tuesday, November 24, 2009

Danny's Tuna Sandwich - Basil, Cheese and Raisins


I call it Danny's tuna sandwich because he had this a lot growing up. Sometimes either I get home really late at night from grad school or we are just being bums. Either way, we loovvee our tuna. He has turned this into an art. Dan does a little extra for his sandwich specifically which I will share with you.

After eating this you will never be able to eat a plain tuna sandwich again.

1. Chop up fresh celery and red or purple onion
2. Mix the squeezed tuna (not oil based--eeww) with the veggies and then add a spoonful of mayo. Dan is pretty generous but it's up to you.
3. Toast wheat bread.
4. I like mine just like this, but Dan adds pieces of basil, a slice of American cheese, and golden raisins.

We ALWAYS eat it with a pickle (Vlasic Zesty is the only real pickle in my opinion) and some cheese puffs.

So easy, so good.

Some more in depth recipes coming your way.

Rice and Beans Chicken Stir Fry


Wow... it has been a long time. I apologize and will work hard to make sure another hiatus like this does not occur. I have a couple older recipes to put up and there will be a big Thanksgiving extravaganza. Fortunately, I will have a real camera for that one and for Christmas I should have a new camera so this blog will get hoppin'!

This is a dish we made about a week ago and it was sooo yummy. I took a chance on buying a rice and got Zataran's red beans and rice. Um, hello, I didn't know this was such good rice. That little jazz man from the commercials was right. If you haven't tried it grab a box, I think you'll be surprised.

Anyway, Dan cooked up some chicken breast in the wok with just a little dash of spices (salt, pepper, parsley). While the rice simmered he finished up the chicken and then we cooked up some zucchini, onions, carrots and green peppers after with some oil. Toss on a plate and eat! The end! Obviously this is similar to our other chicken stir fry, but every little variation makes a difference.

Wednesday, November 18, 2009

Sorry!

Hey followers. Sorry I have not been updating in a few days. I have been down and out with something nasty (dare I say swine??). Updates are on their way once I achieve full lung capacity!

Did have an amazing meal the other night by Dan the Man though. Zataran's beans and rice (yummy stuff) with chicken and veggie stir fry. Pics to come.

Wednesday, November 11, 2009

Veggie and Black Bean Quesadilla


I've eaten a lot of quesadillas in my day. There was that two year stint of vegetarianism... plus there is my sister. When I think of her, and add food, it equals quesadillas. I think this was one of the first things she learned how to make on the stove. During our high school years we would usually have 4 meals a day. The third one, once we got home, was usually something Mexican (bean covered tostitos and salsa, chips and velveeta cheese with chicken and salsa.... anything with salsa). Then I would watch Kids in the Hall. Although, I sometimes ate a cheese, pickle and smart food sandwich as well, but I grew to 5'5" by my thirteenth birthday so you must excuse my insatiable/twisted palate.

Anyway, she has had many years to excel in her quesadilla making art so most of what I have below was probably stolen from her. Anyway, here is what I've got:

Ingredients:
Chopped veggies like peppers, onion, carrot and celery
Black beans
Cheddar cheese or whatever you prefer
Medium salsa if you have a Scottish boy like I do. Or hot if all eaters can handle it. (first time I made this for him I used hot... sweat poured down his forehead the whole time but he refused to stop... that's when I knew he really loved me)
Flour tortillas

In addition, you can add already cooked beef or cooked chicken strips.

On a large grill pan place your tortilla. You will only cover one half of the tortilla and then fold it over. So fill that half with the ingredients listed above. I like to throw some jalapenos in for good measure but you know your own limits.

Fold over the tortilla and fill another tortilla next to it. You can cook two on a grill. Cook for about 10 minutes on the stove top and eat!

There is something really comforting about hot beans and melted cheese. It's like... chocolate is there to fill your lonely little soul.. but Mexican food is there to fill your lonely little stomach.

Sunday, November 8, 2009

Mama's Dinner


Just had to add this beautiful meal my Mom made for her parents tonight. Maybe she'll send some cooking advice. That's an apple pastry for desert (I know there is apple sauce and apricot preserve in it as well).

Veggie and Vodka Shell Pasta


Sometimes, when you don't want to think too hard about dinner, the easiest thing to do is spaghetti with sauce and veggies. This can get pretty old though, especially using red sauce, so here is a nice little twist to keep things interesting.

Ingredients:
Shell pasta
Vodka sauce
A medley of vegetables (in here, cherry tomatoes, zucchini, green pepper, and onion). You can also add whatever else you like, such as carrots, etc.

Start cooking the pasta and heat the chopped veggies in olive oil in a pan. After the veggies start getting soft and the onions get a little golden add in the vodka sauce.

Finish the pasta, pour some of the sauce/veggie mix on top and sprinkle some fresh Parmesan on top. Bon Appetit!

Saturday, November 7, 2009

Cinnamon Apple Walnut Muffins


I loovvee muffins. My favorite has always been chocolate chip. However, I decided to tinker around and try something new. My new favorite pancake has become Cinnamon Apple Walnut this past year, so I figured it would be just as delicious in a muffin, right? Right.

This is easy and a yummy breakfast or desert. I cook this with a big tin for 6 muffins, or you could do the same with a different type of tin, just adjust the time.

Ingredients
Mix together the following in a bowl:
-3/4 cup milk
-1/2 cup veggie oil
-1 egg

Mix these in another bowl:
-2 cups flour
-1/3 cup sugar
-3 tsp. baking powder
-Dash of salt

Then you can add the mixtures together.

Chop up some walnuts, maybe a ½ cup, into small pieces and peel and chop 1 apple into small pieces as well. We made them about ½ inch squares. Mix the walnuts and apple pieces in a bowl with cinnamon and add to the batter. Butter the muffin tins and then add the batter. I sprinkled some brown sugar on top before sticking it in the oven. Cook for about 20 minutes at 400 degrees. It is ssoooo yummy!

Sunday, November 1, 2009

Dipping Oil


Sure...butter is easy to have with bread while you are eating a yummy Italian meal with your Scottish man. But, why have butter when you can have a delicious dipping oil?

My momma got me hooked on this. Growing up we always did butter, garlic bread, or pesto (ohh I should get my Dad's recipe up) but starting in high school she began making this oil mix. I've tweaked it until this is what I do...

In a regular bowl that you share or in separate little dipping trays mix the following...

Good olive oil (extra virgin if you like it-it's a bit strong for me)
A few shakes of crushed red pepper
Pressed or minced garlic. Trust me, it's so much better than garlic powder.
A shake of salt and pepper
A shake of oregano and basil

heat it up in the microwave for about 35 seconds or more depending on how much you have, or heat it on the stove if you are fancy and have a dishwasher :(.

Enjoy! I know a few of my followers like this too...

Fettuccine Carbonara - Revisted


Mmm... just had a great meal tonight. I made plenty so we would have leftovers too-nothing like conserving your food dollar! I have my recipe for this below, but I wanted to add my own picture because I do mine a little differently than it shows in the pic.

Plus - added note, make sure you use high quality bacon. Usually we have used Oscar Mayer and there's a lot of fat and it burns easily. This time I bought Boar's Head and it came out better (thanks to the Meat Man at the helm).

Wednesday, October 28, 2009

Pizza d'Estate


Ah... pizza. I don't know anyone who does not like pizza. It's fast, it's easy, and it can be healthy if you do it right. I made some pizza tonight for me and the man... here's what I did. It took about 10 minutes prep because I'm fastidious, and less than 20 minutes cooking.

First, I went to the grocery store around 5:30 expecting to grab my regular pizza bread. The 15 year-old Polish boy who is crushing on me followed me around the store blushing and dropping things, so I sent him looking for pizza bread when I couldn't find it. They have frozen dough but I'm a woman on a mission and didn't have the time to thaw it out... so instead, after he apologized profusely for not having it, I grabbed some focaccia bread on sale. The scary lady behind the meat counter muttered it would be good. This was my first time using it.

The man made a great salad the other night so I used a lot of veggies he had left over.

Steps:
-Cover a pan with tin foil (easy clean up) and put the focaccia bread on it.
-Cover the bread with some red sauce
-Pick some fresh basil from your plant and place it on the sauce (What?? you don't have a basil plant?? Get on the boat, man!)
-Layer the following items: pepperoni (or prosciutto), peppers of all colors and onion.
-On top of this you put whatever cheeses you prefer. I crumbled some feta I had and then added fresh mozzarella and even a little shredded cheddar. I sprinkled some Parmesan that I had for the texture.
-Sprinkle a smidgen of olive oil on top and shake on some oregano.
-pizza is not pizza without oregano.
-did you know that?
-cook at 425 degrees for about 15-20 minutes.


Mangia and pretend you are back in Trastevere!

Here are pre- and post-pictures. As you can see, I forgot to take a picture after until I had already eaten half - further proof of its deliciousness! Still sorry for picture quality-can only use my phone. The second picture must be fuzzy because of the Utopian haze that surrounds homemade pizza.

Sunday, October 25, 2009

Pumpkin-Shaped Quesadillas


I must admit, I found a version of this online (from All You) and think its a really cute idea. I just tweaked it a little to make it easier. I'm planning on making them Friday or Saturday. I'll post a picture of how it comes out for me.

Ingredients:
tortillas
cheese (whatever you like!)
any veggies you want to toss in.
oil
easiness!

Buy a pack of tortillas that are a reddish or orange color. I know they have a tomato based kind that has this orangey color, or you can look around. If you are lucky and live down the road from Hannaford's (cough cough), I'm sure you have a million options.

I believe each pack has about 8 tortillas in them, which means you can make 4 of these. So if you want more then double it. They are big though...

On the cutting board, pile 4 tortillas and trim the top of them with a knife so that you make a stem of a pumpkin. Then cut out eyes, a nose (or no nose) and mouth however you like. Put these to the side. Then pile up the next four and cut the stems the same way as you did for the first set. That is all though, this second set does not need eyes or anything because it will be on the bottom of the quesadilla. You are going to cook this eyeless set on a frying pan in some oil just for a few minutes each and toss some yummy cheese on top. I personally would probably use some mozzarella with maybe a little cheddar or pepper jack. It's totally up to you. You may also want to sprinkle some chopped veggies in but don't go overboard because you don't want to fill these up too much.

Now that you have the bottom of the quesadilla done with some cheese melted on it, you are going to top it with the pumpkin face tortilla and then toast these in the oven just so they are crispy. You will probably only be able to do 2 at a time on a tin-foil covered cookie sheet, so the first 2 should just be covered so they stay warm.

Enjoy with salsa or whatever else you like.... Happy Halloween!

Dan's Chicken Stir Fry


My man Dan is quite the cook and he's usually in charge of our more meat-based recipes. Chicken with veggies and rice is his go-to meal when he's on deck. We have an awesome wok that Lauren gave us when we graduated that we use for this one. What's great is you can basically use whatever you like. We use chicken cause we are trying to lay off red meat as much as possible and the more veggies the better.

Buy some chicken breasts and cut them up into bite sized pieces. You can mix this with some lemon, parsley and other spices and then start frying them. We put them up on the rack while we cook the veggies.

For veggies we cook zucchini, red and yellow peppers, onion and carrots. Of course you can add or subtract based on what you like. Have some good olive oil while you cook this. If you want rice too you can cook that at the same time - it's up to you.

Mix all together....mangia! easy!

Keep coming back for some quick and easy inspirations for your own kitchen!

Wednesday, October 21, 2009

Calzones


My love for calzones started at Dighton House of Pizza. Greasy fingers... extra sauce. It's all good. Now I'm spoiled since I can get almost any type of food, from Peruvian to Moroccan, by walking a few blocks. Growing up though the Greek joint was the spot.. the closest spot...almost the only spot now that I think of it.

Well, I started making my own calzones... and they are delish.

I have two recipes: one for a spinach and feta calzone and the other for ham, sopressata (or salami) and provolone. The both take about 35 minutes total.

Spinach and Feta Calzone:
-Buy frozen pizza dough and let it thaw for a few hours.
-Also buy and defrost 2 packages of frozen spinach. You'll want to squeeze out the extra water.
-get some feta cheese and a ball of mozzarella.
-Now that you have a bowl of squeezed spinach add a twirl of olive oil, some grated Parmesan, a little pepper and fresh garlic that has either been minced or pressed. Mix it all together in that bowl.
-Roll out the dough with a pin so you make a rectangle...about 1/4 inch thick or less (otherwise it gets too doughy). Then place the spinach mixture evenly and chunks of feta and mozzarella. The feta really makes this dish so be generous. Then I fold the ends of the calzone and then roll it so the edge is on the bottom. Less spills out while it is cooking if you do this.. although I put so much in it it still sometimes comes out-like in the picture.
-Get this on a pan with tin foil and cut three slices along the top so the steam can come out.
-I brush a beaten egg on the top for a nice golden color and then stick it in a preheated oven at about 375 for about 25 minutes. You can probably do even less since there is no meat but 25 will definitely do the trick. All in all, with prep, this should maybe take you 35 minutes.

Sopressata, Ham and Provolone Calzone
-start this the same way by buying and thawing out pizza dough and then rolling it out into a rectangle.
-I buy about a 1/4 pound of sopressata (or salami), 1/4 of ham and a 1/4 of provolone. Any extra can be used for sandwiches or paninis. Then I just place it evenly down the middle of the rectangle of dough. If you have any feta in your fridge toss some in too for a nice white color.
-Roll in the short edges again as it is described above and then roll the whole calzone so the crack is on the bottom.
-Cut three slices along the top for the steam to escape and brush the egg on it for that golden color. Cook for 25 minutes at 375.

Always serve with some marinara sauce and vino rosso! che magnifico! The picture I am including again is from my cellphone. This is actually my first attempt making these. The second time I made them, when my friend Stephanie came to visit, it came out even better. This picture is of two spinach and feta calzones. You can see the difference in egg wash as well (plus that one was in the back of the oven - nicer color). Enjoy!

Monday, October 19, 2009

Tortellini with Pancetta, Peas and Broccoli


If you are anything like me, you aren't a huge salad person. Although... it seems like most people do like salad. Of course, I don't have anything against those who are salad fans, it's just that I personally have a hard time swallowing fresh spinach. For some reason the gag reflex is just triggered. Maybe I ate too much lemon grass in my yard when I was a kid. I'm jealous of people who actually like salads, I wonder if I am missing something. I try to eat them to be polite, but they just aren't me. Soooo, I need to make up for all those nutrients by getting lots of veggies in my other dishes.

With that tirade aside...My mom gave me a version of this recipe (from Relish) the other day and it was a big hit with the man. I always know if it's a success because the table is silent for about 5 minutes-always a good sign.

Ingredients:
1 T olive oil
4 ounces or more of diced pancetta (can just buy it at the store like this)
about 1/2 cup of chopped red onion
2 minced garlic cloves
1 tsp salt and 1 tsp of pepper
1 lb cheese tortellini (I suggest the multicolored pack)
1 cup of frozen peas
1 1/2 cups broccoli florets (I never get the buttered kind...gross)
1/2 cup freshly grated Parmesan cheese (wow, apparently I have spelled "Parmesian" wrong my whole life)

(serves about 5) Cook the tortellini. While the water is boiling...Put the oil in a frying pan over medium heat and add the pancetta until it starts getting crisp (less than 10 mins). Then add the onion and garlic for about 3 minutes. Sprinkle on the salt and pepper...it should begin to smell delicious. In the meantime the tortellini should be cooking. Before it is fully cooked (say when you have 2 more minutes to go) add in the peas and broccoli. The peas will float and the broccoli will go bye-bye below the pasta. Then, dump out the excess water and mix everything together! Feast! Add more cheese if you like.

Sorry for the image quality. This picture is from my cellphone. Definitely eat it with some red wine. The food...not my cellphone.

Dee's Rocky Roads


My friend Isaac's mom is an amazing cook/baker and when we were in college she would send him boxes of deserts. This is her recipe for Rocky Road Bars. You're going to feel pretty naughty eating these... but life is short, right?

1 1/2 cups crushed pretzels
1 1/2 sticks of melted butter
1 can (14 oz) of sweetened condensed milk
2 cups of marshmellows
1 bag of butterscotch chips (12 oz)
1/2 a bag of Heath Bits

You can definitely get creative with these and substitute your favorites, like peanut butter bits instead of butterscotch.

Heat the oven to 350 degrees. Combine the pretzels and butter in a small bowl. Lightly press the mixture into a 9 X 13 pan. Then pour the milk evenly over the bottom. Top this with the marshmallows, butterscotch, chocolate and heath bits and pack this down. Bake for about 25-30 minuntes. Eat and melt. Repeat.

Sunday, October 18, 2009

Mama's Meatballs


This is Mama's so you know it has to be good.

This will make a lot...but its so good who cares.

Mix the following all together in a large bowl:
-1 pound of hamburger meat (Not the veal mix! Save the baby cows!). Try to let it sit out a little so it's not as cold. Either way your hands will get pretty numb.
-about 1/2 tsp of garlic powder
-1 egg
-3 pieces of white bread with their crusts peeled off. Soak these in milk and then squeeze most of the milk out (two squeezes is fine).
-1 Tbsp of cornstarch
-dash of crushed red pepper flakes
-less than a teaspoon of salt
-a dash of pepper and parsley.

Mix all together with your hands and roll into balls. About an inch in diameter or bigger if you don't mind cooking them longer. Put them on a tin-foil covered pan and cook in the oven until brown.

You can use these for meatball subs with melted provolone cheese or with spaghetti and red sauce. If you are cooking them for spaghetti drop them in the sauce before serving. Enjoy the comfort...the bread is what makes it! mmm

A friend of mine's mother adds grape jelly for an extra sweetness - try it if you are feeling adventurous!